|
Home and Office Wireless Networking
|
|
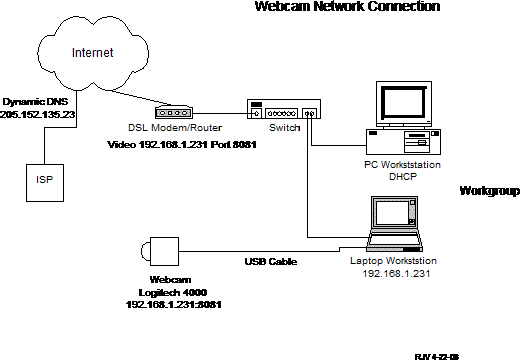
Note: This article presents the method to obtain live streaming video over the Internet with an inexpensive webcam using free software over a dynamic DNS broadband ISP service and a free DNS service. Someone adding this knowledge to his skill set is a good employment candidate for computer networking and security companies. Webcam Viewing Live Over the Internet With Dynamic IP Internet Service by Ron Vigneri This article considers the cost advantages available for live video viewing over the Internet utilizing a USB Webcam with only a dynamic DNS service from your ISP. The ability to configure an inexpensive Webcam to allow remote video viewing in real time is presented in this article. The video system is capable of being utilized for monitoring (nanny, babysitter, room, yard, pool, traffic, etc.), security (premises, cash drawers, etc.), advertising, website content, activity display, beach scenes, surveillance, and many other uses. There are many Web-enabled IP Cameras available, but the cost of the cameras is usually far higher than the cost of the complete webcam system described herein. Higher resolution, sensitivity at lower light levels, plus network operation and power-over-ethernet (PoE) are advantages in IP Cameras, but these features make them higher priced than a USB connected Webcam. The basic system elements required are: 1. PC or Notebook Computer (this article pertains to a MS Windows Operating System, XP Pro utilized herein). The first step is to get the camera operating after connecting it to a USB port on a PC. The length limit for the USB cable is about 15 feet, which limits the location of the Webcam. However, with a powered USB Hub and a longer USB cable the camera can be located further away from the host PC. But you will have to route the cable to the desired location. To provide power to the USB Hub you can locate it at the host PC location. Without the Hub, the setup now looks like the host PC connected with an Ethernet cable to the Switch and connected with a USB cable connected to the Webcam (Fig. 1).
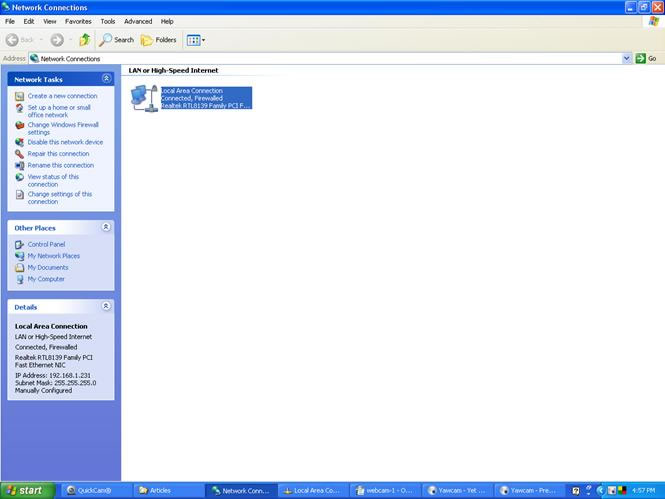
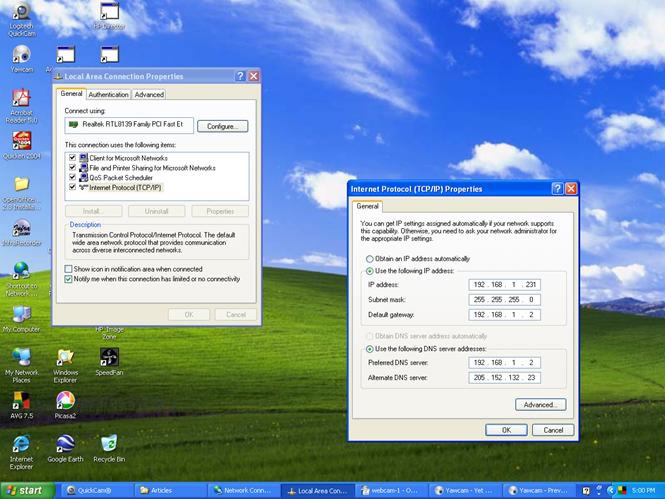
Figure 1. Webcam network diagram. The camera should have come with media containing the Driver for your Operating System (OS). Load the Driver on your system or let Windows discover the device. The Logitech 400 was discovered by the plug-n-play feature in the XP Pro OS and the Driver was loaded. Verify the Webcam is operational by opening the Webcam application per the manufacturers instructions. In the case of the Logitech 4000 the QuickCam software application provided is utilized to view the video image. The next step is to fix the IP address of the host PC through your operating system. In Windows you can open Network Connections, click on the Properties button, select TCP/IP, and input a fixed IP address, for example, 192.168.1.99. If you have are on a network, utilize the same subnet as your router, and use that router's IP address as the gateway entry text box. Enter the DNS addresses with your router IP being the first DNS address and your ISP's DNS address for the second DNS address. Your router settings will have the DNS addresses from the ISP (cable, DSL, etc.) already configured.
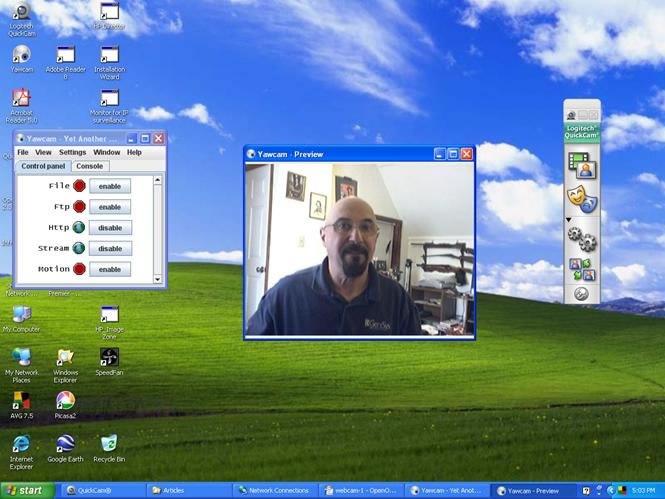
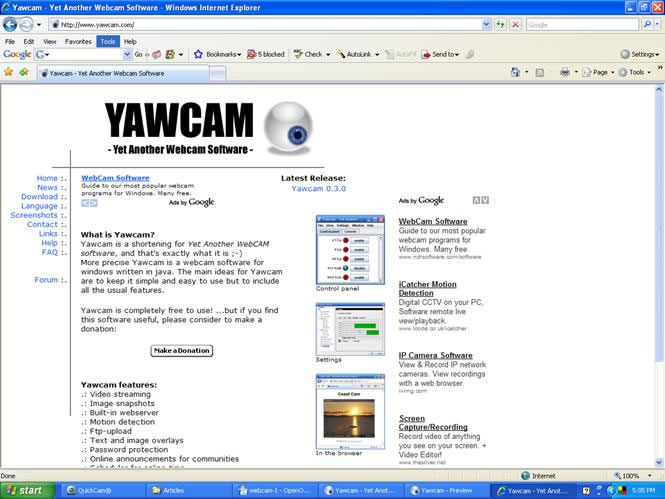
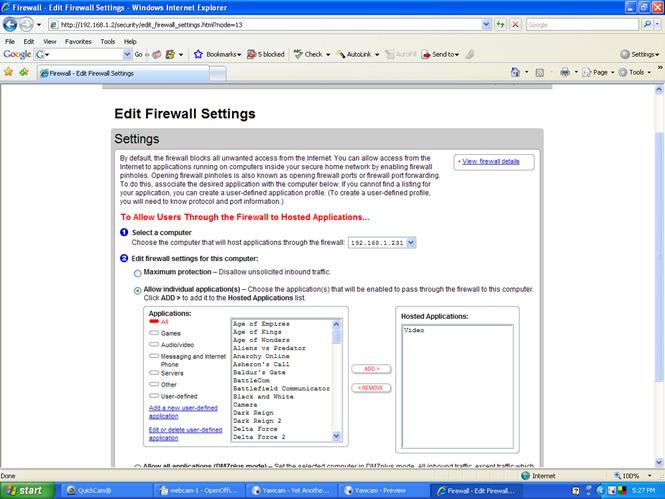
Now download and install the Yawcam software from http://www.yawcam.com . The instructions and a request for a donation for this software are available at this website. Once the software is loaded, reboot the webcam by shutting it down in the QuickCam window selections, and then opening the Yawcam application (click on the YawCam icon on the desktop). In order to allow the video streaming to be sent to the router, you must enable Http and Stream in the YawCam Control Panel window. The router has to be configured with a particular port assigned for the webcam. The router instructions should be followed to assign a port for the camera. For example, port 8081 for the webcam connected to the host PC with IP address of 192.168.1.231, would be yield a webcam address as: 192.168.1.231:8081.
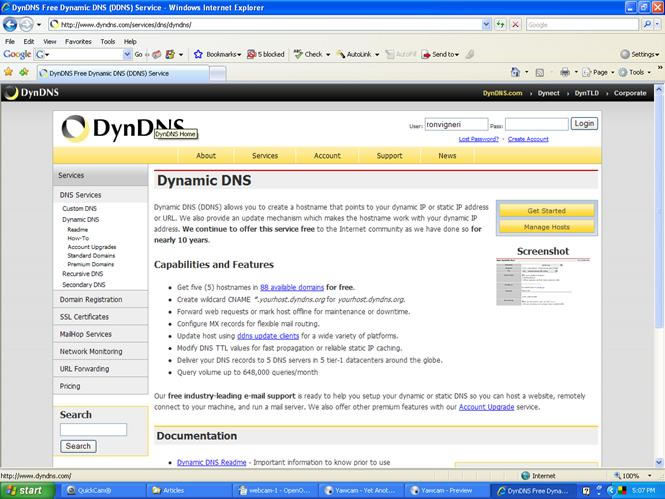
Now to make use of this Webcam over a dynamic IP address as assigned by your ISP. This is the common IP address assigned by your ISP to your service connection, known as a Dynamic DNS service. If you have a Static IP, you do not need to follow the balance of the dynamic DNS instructions. There are a number of dynamic DNS services available online, but one that is very reliable is: The free Dynamic DNS screenshot appears in Fig. 8.
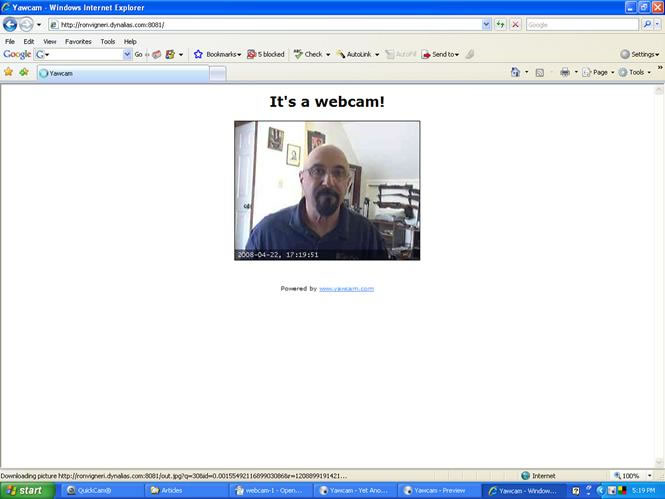
At DynDNS you can select an alias for your webcam address in the form of a URL that can be entered into a web browser to view the webcam video. For example, you can use yourname.dynalias.com:3395 which DynDNS would link to the dynamic DNS IP address that your ISP is assigning to your connection at the moment, which would connect your router with the IP address of your webcam, and the video would stream to the Internet. So by entering the URL (yourname.dynalias.com:3395) in a browser like Internet Explorer, you can see the video from your webcam from anywhere you have Internet access. The DynDNS service continuously monitors your ISP-assigned IP address and updates the DNS pointing of your alias address accordingly. You can use the free DNS service, which is adequate, or subscribe to the higher service levels with additional features. Now you have access to streaming video over the Internet which is viewable from anywhere you have a browser with Internet access utilizing an inexpensive webcam even over a dynamic IP address assigned by your ISP. And this capability requires no outside hosting, fees, licensing, etc., and you control it all. A view of my example Webcam is shown in Fig. 9. To review, this Webcam configuration yields everything an IP Camera features at a far lower cost and works with dynamic DNS service from an ISP. |
|---|